
If you need a no-bake dessert that’s cute, festive, and almost impossible to mess up, these Spring Egg Oreo Cookie Balls are exactly what you’re looking for. Spring parties and Easter gatherings can get busy fast, and sometimes you just don’t have time to bake a full dessert from scratch. That’s where this easy treat saves the day.
Spring Egg Oreo Cookie Balls are rich, chocolatey, creamy, and coated in a pastel candy shell that makes them perfect for the season. They look like decorated Easter eggs but taste like a cookies-and-cream truffle. I’ve made these for family Easter brunch, school parties, and baby showers, and every single time someone asks for the recipe.
In this post, I’ll walk you through the simple ingredients, step-by-step instructions, decorating ideas, flavor twists, and storage tips so your Spring Egg Oreo Cookie Balls turn out perfect every time.
Let’s get started!
Why You’ll Love This Recipe
-
No Baking Required – Perfect for busy spring schedules.
-
Only a Few Ingredients – Simple and affordable.
-
Kid-Friendly to Make – Rolling and decorating is fun and easy.
-
Make-Ahead Friendly – Great for prepping in advance.
-
Beautiful Presentation – Pastel egg shapes are perfect for Easter.
Ingredients & Prep
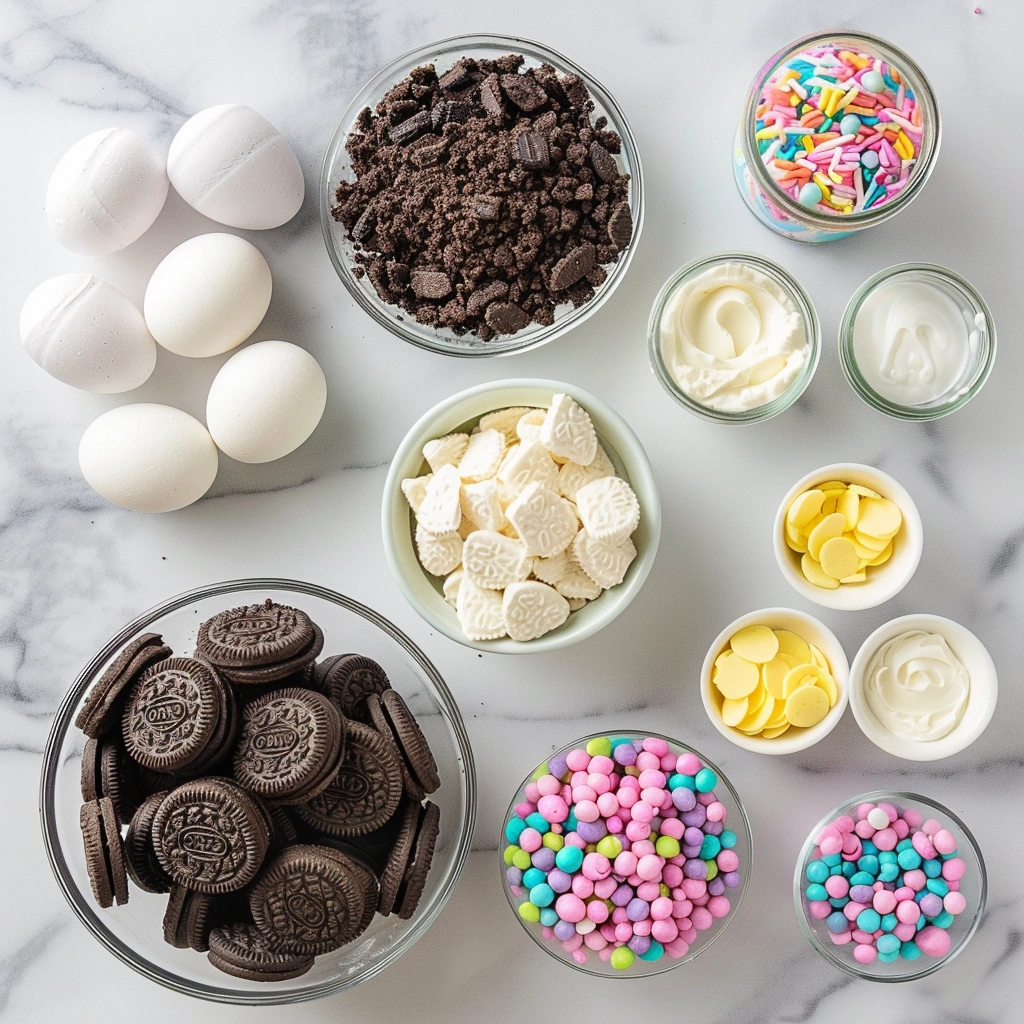
These Spring Egg Oreo Cookie Balls are a no-bake dessert made with crushed sandwich cookies, cream cheese, and a candy coating.
Main Ingredients Prep
-
36 Oreo cookies (regular, not double-stuffed)
-
8 ounces cream cheese, softened
-
12–16 ounces white candy melts or white chocolate chips
Prep Tips:
-
Use full-fat cream cheese for the best texture.
-
Make sure the cream cheese is fully softened to avoid lumps.
-
Do not remove the cream filling from the Oreos — it helps bind everything together.
Seasonings, Sauces, or Flavor Base
For decorating:
-
Pastel food coloring (if using white chocolate)
-
Pastel candy melts (pink, yellow, blue, lavender)
-
Sprinkles
-
Drizzled contrasting chocolate for decoration
You can also use edible glitter or sanding sugar for a festive touch.
Pantry Staples
-
Food processor (or zip-top bag and rolling pin)
-
Mixing bowl
-
Baking sheet
-
Parchment paper
-
Fork or dipping tool
Step-by-Step Cooking Instructions
Pre-Cooking Prep
-
Line a baking sheet with parchment paper.
-
Add Oreo cookies to a food processor and pulse until fine crumbs form.
-
If you don’t have a food processor, place cookies in a zip-top bag and crush with a rolling pin.
-
-
Transfer crumbs to a mixing bowl.
-
Add softened cream cheese.
-
Mix until fully combined and smooth.
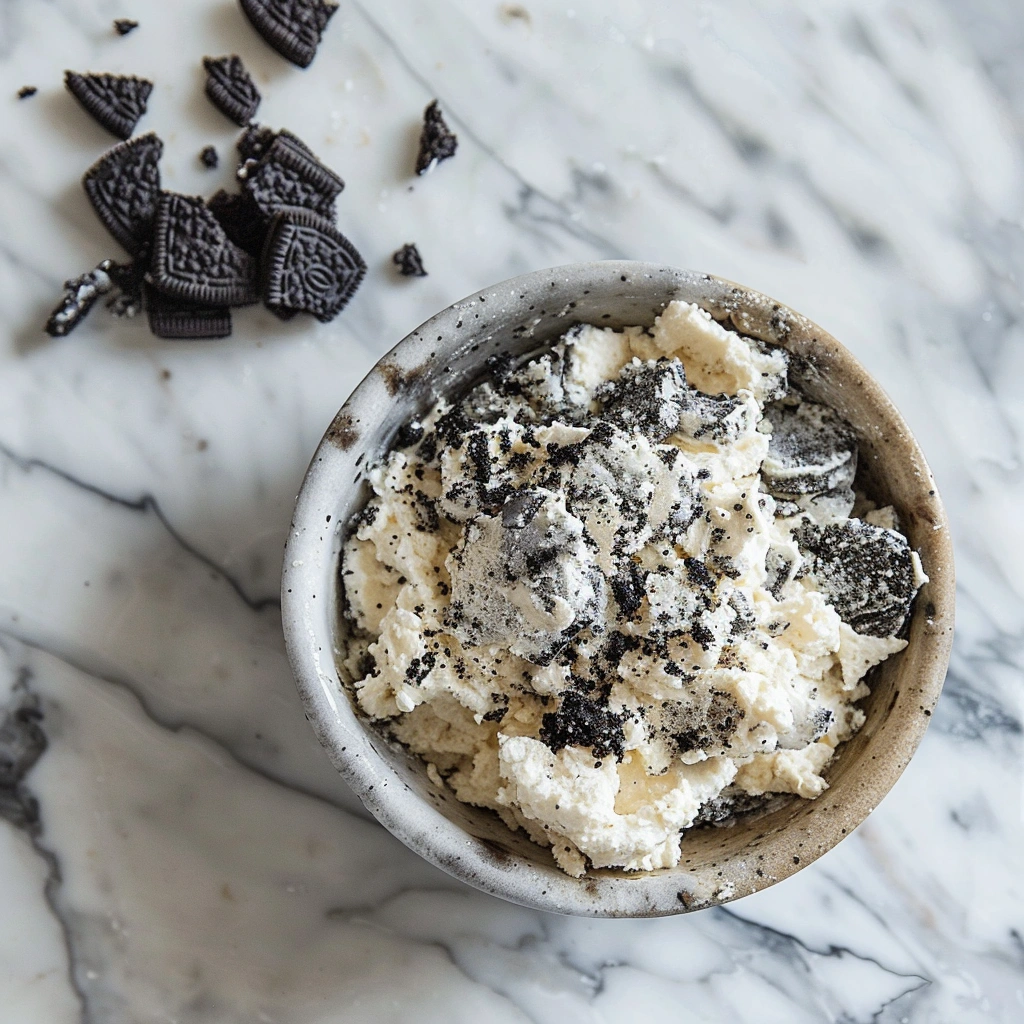
The mixture should feel soft and slightly sticky but hold its shape when pressed together.
Cooking Method (No-Bake Process)
-
Scoop about 1 tablespoon of mixture.
-
Shape into an egg form using your hands.
-
Place each shaped egg onto the lined baking sheet.
-
Freeze for 20–30 minutes until firm.
Freezing helps the eggs hold their shape during dipping.
While chilling, melt candy melts according to package instructions (usually 30-second microwave intervals, stirring between each).
Once firm:
-
Dip each egg into melted candy coating.
-
Use a fork to lift it out and tap gently to remove excess coating.

-
Place back onto parchment paper.
-
Decorate immediately with sprinkles or drizzle before coating sets.
Allow coating to harden at room temperature or refrigerate for 10–15 minutes.
Doneness or Texture Check
Your Spring Egg Oreo Cookie Balls should be:
-
Firm on the outside
-
Smooth and fully coated
-
Soft and creamy on the inside
If the coating cracks, the centers may have been too cold. Let them sit a minute before dipping next time.
Resting or Final Touches
Once coating is set:
-
Drizzle with a contrasting pastel color.
-
Add zigzag lines for a decorated egg look.
-
Sprinkle lightly with edible glitter.
Let decorations fully harden before storing.
Pro Tips for Perfect Results
Common Mistakes to Avoid
-
Not crushing cookies finely enough – Large chunks can cause cracking.
-
Skipping the chill step – Makes dipping messy.
-
Overheating chocolate – Causes thick or clumpy coating.
-
Letting coating pool at the bottom – Gently tap fork to remove excess.
Recommended Tools
-
Food processor for smooth crumbs
-
Cookie scoop for even sizing
-
Fork or dipping tool
-
Parchment paper for easy cleanup
-
Microwave-safe bowl
Storage & Reheating Tips
Store Spring Egg Oreo Cookie Balls in an airtight container:
-
Refrigerator: Up to 1 week
-
Freezer: Up to 2 months
If frozen, thaw in the refrigerator overnight before serving.
These are best served slightly chilled for the perfect creamy texture.
Flavor Variations
Spring Egg Oreo Cookie Balls are easy to customize for different tastes.
Spicy Version
For a subtle warm twist:
-
Add a small pinch of cinnamon to the cookie mixture.
-
Mix in a tiny dash of espresso powder for depth.
This gives a slightly richer, bakery-style flavor.
Healthy / Special Diet Option
Lightened Version:
-
Use reduced-fat cream cheese.
-
Make slightly smaller egg shapes for portion control.
Gluten-Free Option:
-
Use gluten-free chocolate sandwich cookies.
Dairy-Free Option:
-
Use dairy-free sandwich cookies.
-
Substitute plant-based cream cheese.
-
Use dairy-free chocolate melts.
Global Flavor Twist
-
Lemon Spring Eggs: Add ½ teaspoon lemon zest to the mixture and use yellow coating.
-
Strawberries & Cream: Mix in freeze-dried strawberry powder for a pink center.
-
Coconut Cream: Add 2 tablespoons finely shredded coconut for texture.
Each twist keeps the creamy Oreo base but adds a fresh spring flavor.
Serving Suggestions
Spring Egg Oreo Cookie Balls look beautiful on a spring dessert table.
Serve them:
-
On a cake stand surrounded by pastel candy
-
In mini cupcake liners
-
In Easter baskets
-
On a dessert charcuterie board
Pair with:
-
Fresh strawberries
-
Lemon bars
-
Sugar cookies
-
Iced coffee
-
Lemonade
They also make adorable edible gifts when packaged in clear treat bags with pastel ribbon.
FAQs
Can I make this ahead of time?
Yes! Spring Egg Oreo Cookie Balls are perfect for making ahead. You can prepare them up to 3 days in advance and store in the refrigerator. They actually taste even better after chilling because the flavors blend together.
You can also freeze them up to 2 months.
How do I fix common mistakes?
Coating is too thick:
Add 1 teaspoon of coconut oil to melted candy and stir until smooth.
Eggs are cracking:
Let frozen centers sit at room temperature for 2–3 minutes before dipping.
Mixture too sticky:
Chill longer before shaping.
Conclusion
These Spring Egg Oreo Cookie Balls are the ultimate easy spring dessert. They’re creamy, chocolatey, festive, and completely no-bake — making them perfect for Easter, baby showers, school parties, or any spring celebration.
With just a handful of ingredients and simple steps, you can create a dessert that looks impressive but takes minimal effort. Once you try these adorable egg-shaped treats, they’ll become a yearly spring tradition.
If you loved this recipe, save it for later and share it with a friend who needs an easy Easter dessert idea. And if you’re planning a full spring dessert table, pair these with pastel sugar cookies or lemon cupcakes for a bright and beautiful spread.

Spring Egg Oreo Cookie Balls
Ingredients
- 36 Oreo cookies regular, not double-stuffed
- 8 ounces cream cheese softened
- 12 –16 ounces white candy melts or white chocolate chips
- Pastel candy melts or gel food coloring pink, yellow, blue, lavender
- Sprinkles or edible glitter optional
- Optional: 1 teaspoon coconut oil to thin coating if needed
Instructions
- Step 1: Prepare the Cookie Mixture
- Line a baking sheet with parchment paper.
- Add Oreo cookies to a food processor and pulse until fine crumbs form.
- (Or crush in a zip-top bag using a rolling pin.)
- Transfer crumbs to a mixing bowl.
- Add softened cream cheese.
- Mix until fully combined and smooth. The mixture should be soft and hold its shape when pressed together.
- Step 2: Shape the Eggs
- Scoop about 1 tablespoon of mixture.
- Shape into an egg form using your hands.
- Place onto the lined baking sheet.
- Freeze for 20–30 minutes until firm.
- Step 3: Coat in Candy
- Melt candy melts according to package instructions (30-second microwave intervals, stirring between each).
- Remove eggs from freezer.
- Dip each egg into melted coating.
- Lift out with a fork and tap gently to remove excess coating.
- Place back onto parchment paper.
- Step 4: Decorate
- Immediately add sprinkles or drizzle contrasting melted candy on top.
- Let coating harden at room temperature or refrigerate for 10–15 minutes.
Notes
- Do not remove Oreo filling — it helps bind the mixture.
- Make sure cream cheese is fully softened to prevent lumps.
- If coating is too thick, stir in 1 teaspoon coconut oil.
- If coating cracks, let frozen centers sit at room temperature 2–3 minutes before dipping.
- Store chilled for best texture.